A password on your computer or laptop has been and remains the best way to protect your data from unauthorized people. Privacy and information security are very important in the 21st century, so we recommend setting a password if you do not live alone or often take your laptop with you to crowded places. How to set a password on Windows 10
In this article, we will figure out how to set a password on a computer with Windows 10, as well as how to password-protect individual elements of the system to protect yourself as much as possible.
How to set a password on Windows 10
How to set a password for your account
In Windows 10, and other versions of the OS, the password is what you enter immediately after your device turns on or wakes up from sleep mode.

Using the Start Menu
To put protection on your account through the Start menu, you first need to call it. This can be done through the on-screen button or the Windows button on the keyboard. After that, you need to go to the “PC Settings” tab, and in it open the “Accounts” menu. You will see a “Login Options” tab – this is exactly what we need.
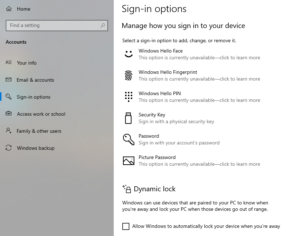
Inside you will see several different entry options. They may differ depending on the version of Windows 10 on your PC and its capabilities. On the “Login Options” page, you can either set a password using numbers or letters or set up login using a face scan or fingerprint.
To set protection, click on the “Password” section. If you have not installed it on the system yet, you will be offered to specify any convenient option. If the security code is already set, you can change it. To do this, you will need to indicate the current one, and only then change it to a new one.
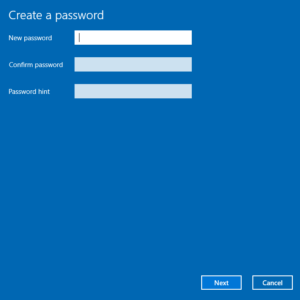
Windows will also prompt you to provide a password hint. It will appear if you make a mistake in the symbols. So you can set as protection any word, set of numbers, or phrase that has a special meaning to you, and set a hint in case you are afraid of forgetting it.
Once you finish filling out the form and confirm the password setting, it will take effect immediately. Now, every time your PC goes into sleep mode or turns off when you start the screen, you will need to enter the installed protection code to get into the “inside” of the PC.
Via command line
The command line is used for more than just quick access to system settings. With its help, you can both set a password and change it at any time. This option is only suitable for experienced users, so be careful and use the first option from the article if you are not confident in your abilities.
First of all, you need to open the command line. You can do this in two ways: by searching in the Start menu or by right-clicking on the Start button and selecting “Command Prompt (Administrator).” After this, you will open a command prompt with administrator rights.

In the line write net users and press Enter. This will open a list of users who can log in to your PC. You just need to select the account you want to set a password for and enter a simple command:
- net user (user) (password).
The items (user) and (password) indicate the account for which you want to change the login protection and the password itself that you plan to set. For example, if you want to set the login code 1234 for the Admin account, the command would look like this:
- net user Admin 1234.
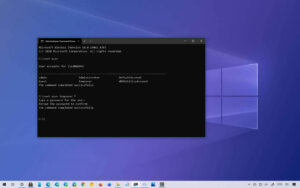
After this, you will be able to log in using the Admin account only using the specified password. You can also change user protection at any time if necessary.
Password requirement While loading’s
It’s not enough to just put a password on your PC. Sometimes it happens that for some reason the computer does not ask for it at login. Most likely, in your settings, the option to require a code from your account is simply disabled. You can turn it on without any problems.
To do this, open the “Run” menu. This can be done using the Win+R key combination or by right-clicking on the Start menu. After the window with the input line opens, enter control userpasswords2 in it and click OK.
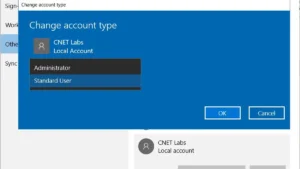
Now you will need to select the account that you want to set the mandatory username and password requirement. Check the box next to this item and enter the security code for this account. After that, click OK again.
When resuming from sleep mode
And if you want your PC to be protected during sleep mode, then make sure that when you exit it, it also asks you for an account code. To do this, follow the instructions:
- Open the Start menu;
- Go to “PC Settings”;
- In the window that opens, go to the “Accounts” section;
- In the “Login required” item, check the box in the “Time for the computer to wake up from sleep” section.
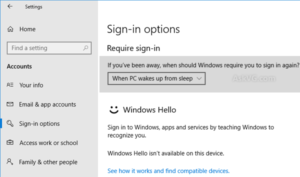
It is important to note that this option will not work, for example, on laptops. Since you can set a password on a laptop in the same way as on a regular PC, you can change it, but you cannot change the wake-up time on portable devices. The laptop will always ask you for a password when it wakes up, if, of course, it is set.
But you can configure the period after which your device will go into sleep mode. This can be done through the “Control Panel”. You need to go to the “System and Security” tab and find the “Power Options” item there. In the menu on the right there will be a line “Setting the transition to sleep mode”, select it and a window will open. And already in it, you can set the period for the PC to “sleep”. For example, 5 minutes.
BIOS and hard drive
You can also set a password to protect the BIOS and system drive to save your data and prevent you from formatting your PC in case hackers do break into your account protection.
BIOS
To install protection on it, hold down the key combination when turning on the PC. You can view it separately on the Internet if necessary.
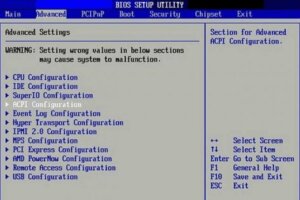
After opening the BIOS, go to the “Security” section (use the arrows to control). After that, select “Change (Set) Supervisor Password” and set a security phrase, word or combination of numbers. You can also configure BIOS protection for a specific user by selecting “Change (Set) User Password”. To save changes and start your PC, press F10.
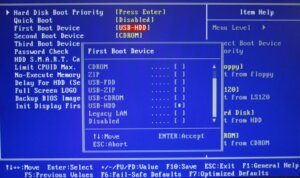
HDD
Hard drive protection can also be installed through the BIOS. To do this, you need to select the “Change (Set) HDD Password” option. If there is no such tab, then your PC does not support password protection of your hard drive.
To save changes, also press F10.
Now you know how you can protect your account in Windows 10, as well as in what ways you can install protection on the BIOS and even your hard drive. And you can read even more useful articles on our website.
How to set a password on Windows 10
Also Read:How to recover WhatsApp after deletion
Also Read: How to set up startup in Windows 10


