Microsoft has included Windows Defender, an integrated antivirus, in its operating system for a long time. While it is a good substitute for commercial solutions, there are many circumstances in which it must be disabled. We will discuss how to disable Defender on Windows 11 in this article. How to completely disable Windows Defender Antivirus
Using a third-party antivirus

Installing a third-party antivirus software instantly disables Windows Defender. This is the safest method of computer protection available because it lowers the likelihood of software conflicts while enabling you to utilize a reputable third-party antivirus.
These instructions will assist you if you are still considering turning off Windows 11 antivirus.
Disabling via group policies
Attention, this method is not suitable for Windows 10 Home OS.
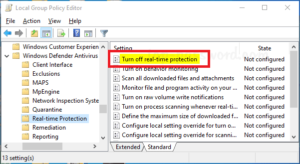
- Press Win + R, type gpedit.msc and press Enter;
- Navigate to Computer Configuration > Administrative Templates > Windows Components > Windows Defender (or Windows Defender Antivirus) > Real-time Protection;
- Double-click “Turn off real-time protection”;
- Select Enabled, then click OK;
- Go to Computer Configuration > Administrative Templates > Windows Components > Windows Defender > Cloud Protection;
- Double-click “Cloud Protection”;
- Select Enabled, then click OK;
- Restart your computer.
Disabling via the registry
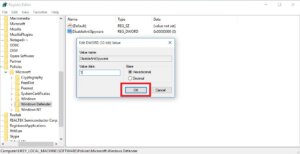
- Press Win + R, type regedit and press Enter.
- Navigate to the following path: HKEY_LOCAL_MACHINE\SOFTWARE\Policies\Microsoft\Windows Defender;
- If you see the DisableAntiSpyware option on the right, double-click on it and set the value to 1 to disable Windows Defender1. If there is no such setting, create one: right-click in the empty space, select New -> DWORD (32-bit), and name it DisableAntiSpyware;
- Reboot your system to apply the changes.
Using third party tools
Third-party programs are available to assist with disabling Windows Defender. It is not advised to utilize such tools, though, as they might not be trustworthy or secure. But first, let’s examine Defender Remover, the most widely used and straightforward tool.
Defender Remover
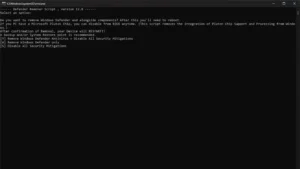
- Download Defender Remover from this link . In the releases category, select the latest one at the moment;
- If Windows Defender complains, allow Defender Remover to operate on your computer;
- Run the program and write the English Y.
ToggleDefender
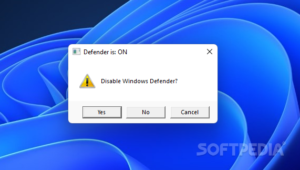
Use this technique only if disabling Windows Defender is an absolute need. This unique script turns off the Windows Defender antivirus program’s service and all related settings.
Download the script
- Go to the official website of the script developer.
- Download the disable-windows-defender.ps1 file. To do this, click Download Now.

Unblock the script
- Right-click on the downloaded .ps1 file;
- Select “Properties”;
- In the “Security” section, check the “Unblock” box;
- Click “Apply” and “OK”.

Run the script
- Double-click the disable-windows-defender.ps1 file;
- In the window that appears, press Enter.
Wait for the script to complete
- The process of disabling Windows Defender will take about a minute;
- There will be no success message.
If you need to permanently but temporarily disable Windows Defender
Use Powershell to frequently turn Windows Defender on and off temporarily.
- Click start, start writing Powershell. Windows will prompt you to open the program;
- Write one of the following commands:
- Set-MpPreference -DisableRealtimeMonitoring $true – disable;
- Set-MpPreference -DisableRealtimeMonitoring $false – enable.

Temporarily disabling the antivirus through general settings
Microsoft itself describes one approach to temporarily disable it. The organization requests that you use it less frequently and, if needed, add certain folders to exceptions. Having said that, this is how to use the general settings to turn off Windows Defender.
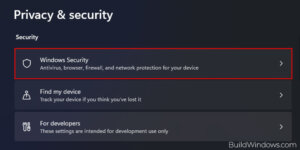
Open the Windows Security app
- Click the Start button and select Settings;
- From the menu on the left, select “Privacy and Security”;
- In the “Protection” section, click “Windows Security”
Select Virus & Threat Protection
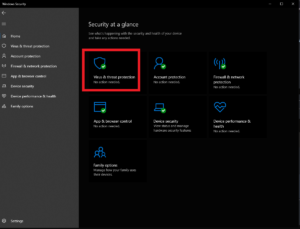
Turn off protection
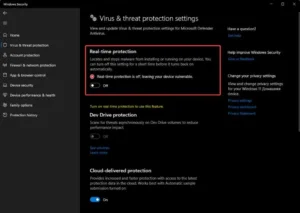
- Under Microsoft Defender Antivirus Settings, move the Real-time Protection slider to the Off position.
- Virus & theat protection setting – “Microsoft Defender Antivirus Settings”;
- Real-time protection – “Protection in real time”;
- Off – “Disabled”.
These are the easiest and most widely used methods for turning off Windows Defender. We hope they were beneficial to you! How to completely disable Windows Defender Antivirus
Also Read: How to Create a Hidden and Invisible Folder in Windows
Also Read: How to disable antivirus on Windows 10


